Tuesday, October 1, 2013


Twisting to the 60's!  What a great blog hop topic for those of us who have so many memories of the 1960's......  I'll be sharing  only a few of my memories, as this was quite a decade with many highs and lows..... way too many to write about.  I do remember twisting to Chubby Checker and Joey Dee with my Brother as we listened to the hi-fi in the living room! 
 
My usual thank you goes out to Madame Samm for always bringing great hop topics that inspire us to get out the fabrics and begin creating.  And for this particular hop, my thanks also go to Mary for organizing all of the participants and cheering us on each day.  Thanks Madame Samm and Mary!
 
After you have visited my blog, I hope you will pay a visit to the other bloggers that are joining me today on our trip through the 60's!
 
                   Gracie Oliver Arts (You are here)
 
I'll start off with a few items that I have hoarded stashed away for many decades. 
 
The peace medallion in the center is vintage and I bought it in a head shop in the 60's.  I wasn't a druggie, but I loved to frequent the head shops for great jewelry, clothes, and art work.  I could always find a great treasure.  Trippin', man.....
 
Of course, Kennedy was the "Man for the 60's".  That particular pin changes pictures as it rotates and has a portrait of Kennedy for the other view. 
 
I made the macramé choker, along with tons of other macramé items, in the sixties and seventies.  I still have a large macramé wall hanging out in my garage and can't bare to part with it.  I made lots of jewelry, purses, and even a vest or two.   
 
Lastly, I have my POW/MIA bracelets to show you.  I wore-through the first one after wearing it for more than 12 years, never taking it off.  Many years after that, I found a place that still made them and I ordered a duplicate of the same soldier that was on my first bracelet.  To this day, he has not been accounted for. 


Here's a newspaper article from 1965 when I headed off to Chicago to see the Beatles!  I went with two girlfriends and their parents and had the time of my life.  I remember that the tickets cost $5.50, which my parents thought was outrageous considering that amount of money would also get you into an Elvis or Frank Sinatra concert.  The Beatles were expected to be only a short lived "fad". ;) Even so, Mom bought me a new dress (yes, a dress..... that's what everyone was wearing to concerts in those days) and gave me spending money for the day.  Our seats weren't that close to the stage, but we kept thinking that we were actually breathing the same air as the Beatles!  What a rush!  I still have my ticket stub, the program, and a few souvenirs from the concert.  It's a great memory to this day!    Here's a link if you'd like to join me at the concert, 48 years ago..... (when I found this link... I shed a few happy memory tears)


Well, after that picture above, my hair grew out and never saw a perm again!  I believe this picture was taken in the early 70's, but I wanted to show you my VW bug.  It was brand new and a bright, sunshine yellow.  My boyfriend drove a beater pea green bug, my parents had a pea green bug, and my Brother had a drab, army green VW bus.  They weren't fancy, but they were hardy and dependable. 


I hope you are still with me.  On to my project for the hop.
 
As I said earlier, the 60's were full of ups and downs.  Turbulent, tumultuous and full of riots, demonstrations, and war .... a decade of contradictions.  I'm heading to that dark side now.  Toward the latter part of the 60's, my Brother joined the army and was deployed to Vietnam.  In those days, there was no email, no Skype, no cell phones, and no way of communicating except snail mail, which could take weeks to get to the US.  We never knew where my Brother was located and if he was OK.  As a Green Beret medic, he was always in the middle of the most dangerous action and it was a terrible time for my entire family.  I'm happy to tell you that he did make it home in one piece, even after being shot and living through more trauma than I can begin to imagine.  
 
This wall hanging is dedicated to all of the service men and women, in all wars, past and present, who have put their lives on the line for our freedom.   


I chose the typical hand peace sign, but added the POW/MIA bracelet to remind us that thousands of military personnel are still unaccounted for.  The blood drips are to remind us that wars are never really over.  Someone is always hurting, remembering, feeling the loss of loved ones, and knowing the pain of war.  The wounds of war never really heal.... thus, the constant open wound and the constant search for some form of peace. 


I chose a crazy patch design for my borders, as the 60's were crazy times ten!  I also chose some of the darker batiks.  I did batiking in high school and I often ended up with very dark fabrics as I would paint the wax resist, dip in dye..... and do it over again however many times it took.  Often, my fabrics were very muddy.  I couldn't find any fabrics from those days in my stash.  Most of them were made into purses and skirts and they are long gone.  You know how it goes..... just about every style comes back someday.... should have hoarded kept those too!


On a lighter side, here's Oliver in his peace vest.  I couldn't get a cute picture because the emblem was on his back and I couldn't get him to look over his shoulder toward the camera.  I bought this for when the power goes out in the winter and it gets chilly in the house.  He's only had to wear it a few times for a few hours, but it gives him some extra warmth.  He's one groovy (and toasty warm) cat!


I hope you have enjoyed my trip down the sixties memory lane.  As I've said, it was a great decade, full of so many momentous events and occasions.  It was a decade full of life lessons that took me from a young girl into a young woman.  Good and bad.... I cherish those memories.


Here's a little giveaway for you.  I've got three bright fat quarters for one of you.  They aren't from the sixties, but they kind of have that feel.  Just leave a comment and you are eligible for a random draw.  I'll make the draw on Saturday, October 5th, and will email the winner.  If you are a no-reply commenter, I will draw again...sorry.


Thanks so much for visiting today and please visit the other bloggers as they share their Twist to the 60's blog hop projects!


Tuesday, September 24, 2013

 
I have something a little different to show you today... a miniature scene.  I saw something similar on Pinterest and knew that I wanted to make my own version of a mini laundry room. 


This is a large detergent bottle and it took me over two months just to use the soap.  I've been collecting miniatures for most of my life, so I only had to dig out a few boxes to find some goodies to put inside my laundry bottle.


I just cut out the front of the bottle, using the label as my guide.  I also cut out the back so that I could insert the octagon window.  It was pretty dark inside the laundry without the window. 


I added a wallpaper border and put a tile floor in the bottom.  I wanted to wallpaper the whole bottle, but those curved walls were too tough to paper (I even tried using cloth for flexibility) and I settled on just a border. 

 
There isn't much square footage in a detergent bottle so I wasn't able to fill it with as much as I would have liked.  I'm sure I'll add more items as I come across them in my stash-o-stuff.

 
This little cat is signed and dated on the underside "SM 1980."  I have several cats (and doll figures too) made by this artist, Sylvia Mobley, including two custom made cats of Darcy and Grover, my first cat babies that I had in the 70's and 80's.
 
This was a fun and quick project (after I used the soap) and I enjoyed reminiscing through some of my miniature collection. 
 
I'm thinking that I need to make a sewing room next.......!

Wednesday, September 11, 2013

 
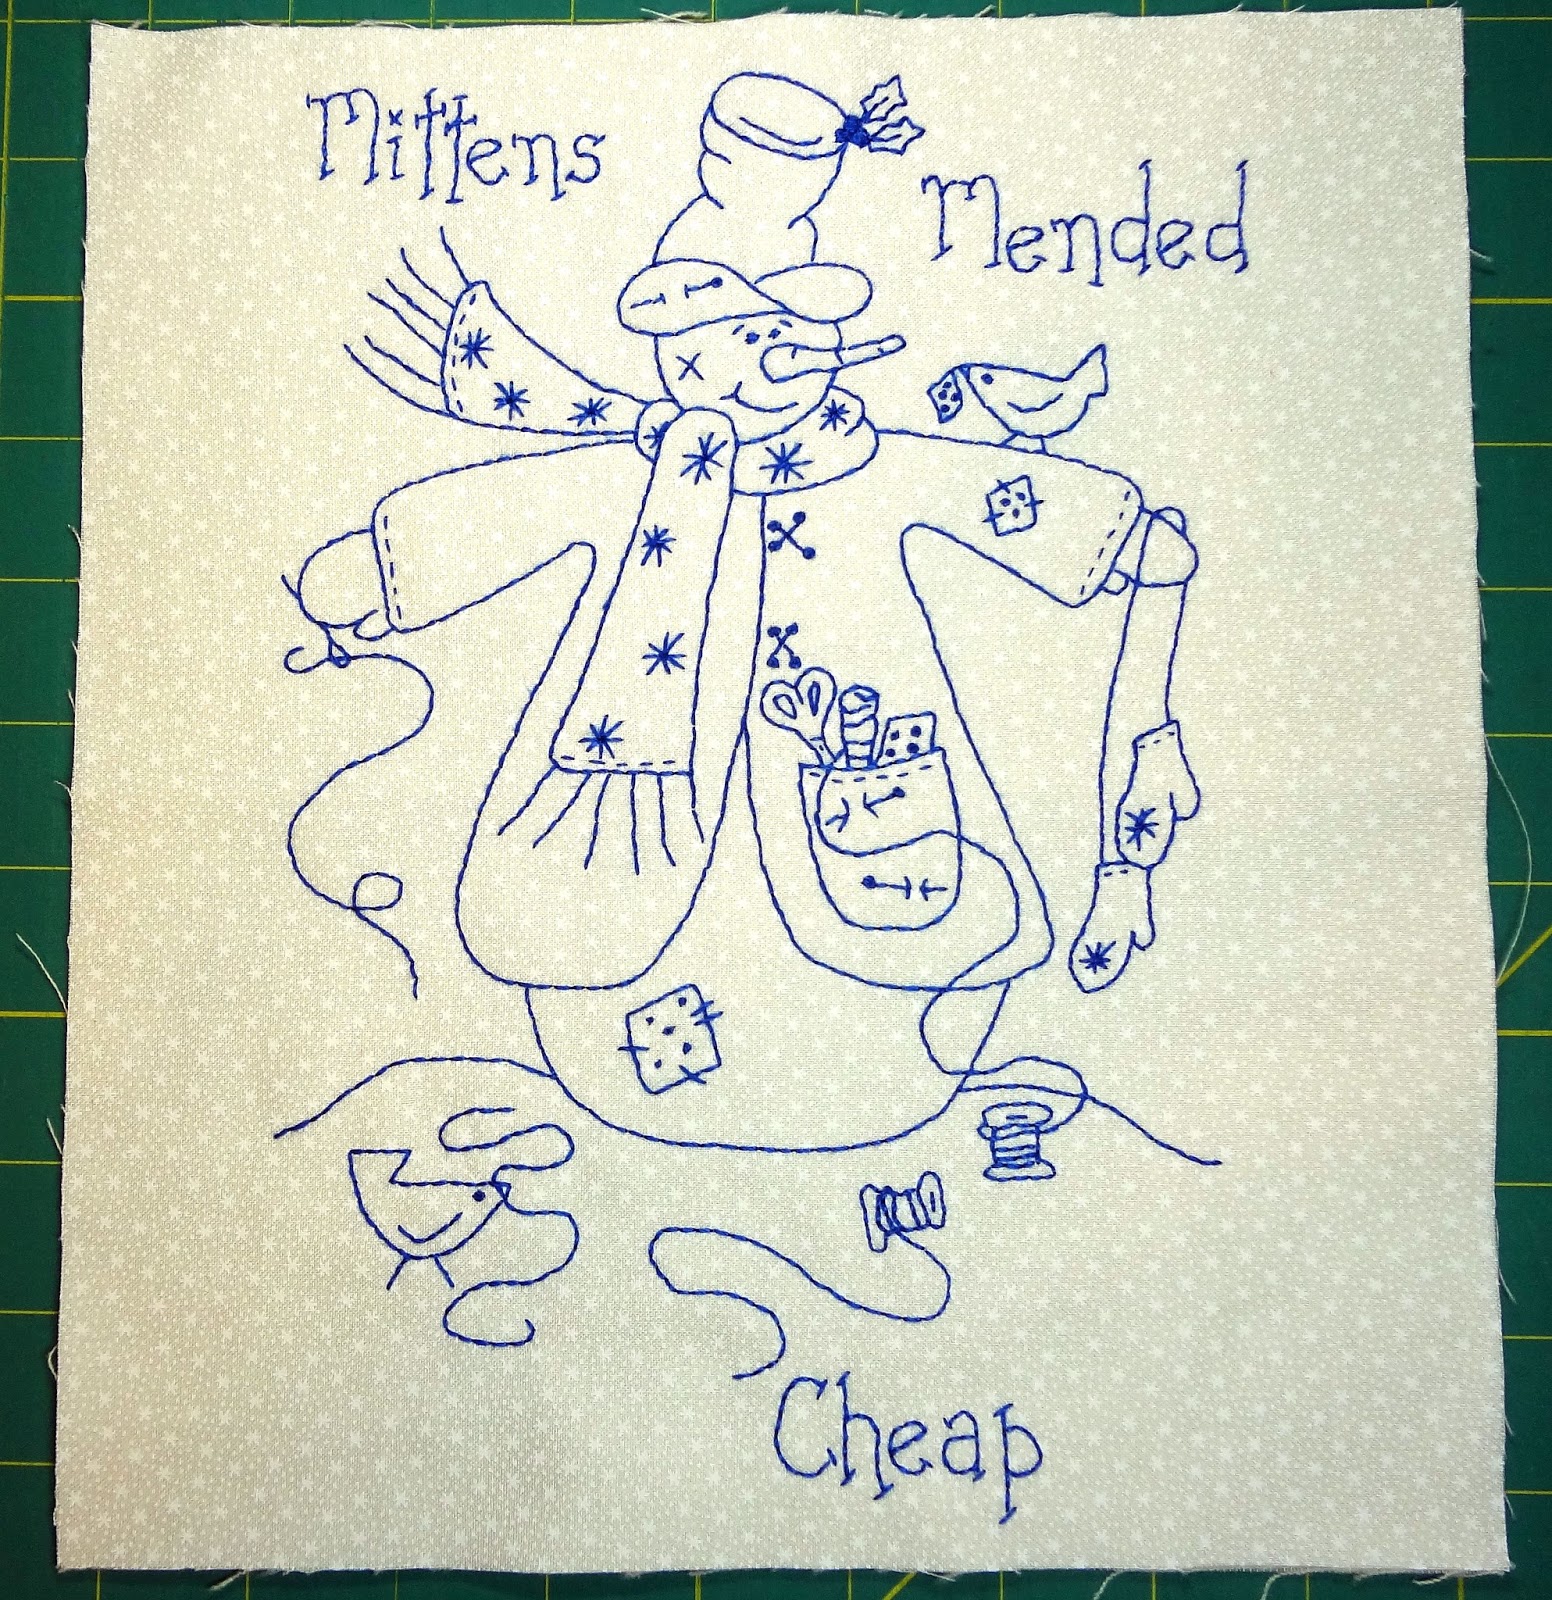
Look what came in the mail.... a wonderful winter stitchery from Pauline at Quilt N Queen!  I won this from a random drawing during the Ho Ho Ho blog hop.


It's so cute!  Since the stitching is already done, I'm planning on simply adding some borders and sizing it to fit my table quilt stand.  With temperatures in the mid 90's today, the vision of snowmen is very refreshing!  Thanks, Pauline!

Monday, September 9, 2013

 
I forgot to show you my new ribbon jar.  I first saw this idea on Pinterest and while shopping at a thrift store last week, I came across this big jar for $.19..... pretty good price!  I'm not sure what the size is.... none of my canning jar lids fit it..... too small or too large..... but I would say it is a large pickle jar size.


Anyway, I wrapped each spool of ribbon around a tongue depressor and secured each ribbon with a straight pin.  I have 40 spools of ribbon in this jar..... much, much less space than the spools took.  I didn't wrap any of the wire-edged ribbon, as it would leave it too kinky and a pain to straighten for use.  As it is, I'll bet I'll have to iron the ribbons to remove the waves.   That's OK though, at least it doesn't take up much space and I like the way it looks.  Back to more ribbon wrapping....... 

Sunday, September 8, 2013

 
This weekend (Thursday - Monday) was my annual roomie reunion (high school friends, then roommates in college) and I was not feeling well enough to make the trip.  We were to gather at Cathy's cottage in Michigan for some girl time and R & R on the lake.  Well.... all was not lost..... they decided to take one of the days and drive down to my house and spend some time with me!  I felt really guilty that they would loose a day of relaxing on the boat and spend many hours on the road, but they came anyway so that I could be a part of this vacation.  True friends, right?!   


It was just what I needed.... some girl time with lots of laughs.  I love these dear ladies and it really lifted my spirits!


After they left, Oliver and I started to work on my Twist to the 60's blog hop idea.  He picked out several batiks for me to use in my project.  (Oliver seems to think that pre-heating the fabric will make it easier to work with...) I'm hoping to make a good dent in it this afternoon.  We'll see.....

Saturday, September 7, 2013


I know...... I said I wouldn't join any more hops until my Christmas projects were finished.  Well, my self control is having issues when they keep having these wonderful blog hop topics.  Who can resist..... certainly, not me!
 
There's a link on my sidebar if you want to join me in some Wicked fun!  The first 100 will be accepted, so jump in while there is still an opening.    See you in October at the Wicked Hop!


Sunday, September 1, 2013


There's another blog hop in town and I have joined in the fun!  I've added a blog button on my left sidebar if you'd like to check it out for yourself.  Madame Samm and Mary will be cheering us along the way!
 
I told myself that I would stay away from blog hops until after my Christmas projects were finished..... no, my projects aren't finished....  This just sounded like a fun hop and it stirred up a few memories that I'd like to put into a project of some kind. 
 
The schedule hasn't been posted yet while they wait to fill the spaces and get things organized.  I'm hoping for a date toward the end of the hop to give myself more time. 
 
Here we go...... a trip back to the 60's!  Far out!


Thursday, August 29, 2013

 
It's finished!  I finished my Sew Lux Fabrics Holiday Hustle Quilt Along today.  I started this the beginning of August with the hopes of finishing it by the 31st, in time to be included in a random drawing for a great gift certificate from Sew Lux Fabrics.  Dangle a carrot in front of my nose if you want to get me moving!  And I managed to get it all finished, even with Oliver's sweet help.  I was trimming and squaring the quilt today when he pulled the scraps off to play with under the table. 


Here's the finished quilt.  It measures 51" x 59", a little smaller than the pattern says, but I must have taken up some fabric with my quilting.  And another use for Wonder Clips is to hold quilts up for pictures.  The photo doesn't show it, but the quilt is being held by wonder clips hooked to two hangers gripping the top of my entertainment center.  It worked well since I have no open space to place a quilt for photos.


This is my quilting pattern..... just simple, wavy lines running from top to bottom.


I tried the new (new to me, anyway) binding technique where you machine sew the binding on the back, fold it over to the front and machine sew it .... yes, machine sewn on the back and the front!  Here's how it looks on the front.  I used my stitch-in-the-ditch foot to sew between the two fabrics used in the binding.... kind of gives it a piping look.  It was very easy to do and I know that I'll be attaching most of my bindings this way in the future.  This technique is great for quilts that get a lot of use and washing.  The binding will really hold up!  Here's a link to the binding technique..... Susie's Magic Binding.  This tutorial has complete instructions so this won't be as confusing as my description.  Give it a try... you'll love it!


This is the back side of the quilt folded over onto the front.  By sewing the binding from the front side, you will have a narrow line of stitching below the binding on the backside.  I don't find this unattractive, but on an heirloom quilt, I would still hand sew my binding.


Here's the backside again, showing one of the corners.  It looks the same as any binding except for that narrow line of stitching below the binding. 

 
It only took me an hour and a half to sew the binding on this quilt!  That's the back and the top, both sides... completely finished.  It was really nice to finish a quilt binding so quickly.
 
Christmas in August!  One project done.... many more on my to do list! 

Thursday, August 22, 2013

I focused on my BOM's this week and finished all three.  The first two are the BOM's from Sew Lux Fabric..... same pattern, two color ways.  The corners were paper pieced so these blocks went together really quickly.  The background fabric is white, even though it seems to have a blue cast on my monitor. 


This block is from The Fat Quarter Shop.  This is the 3rd block in this series and now I'm sure that this is going to be a basket quilt.  So far, all three basket blocks also share that blue square in the center.  Edyta Sitar of Laundry Basket Quilts designed this block.  I just love these blocks!


Saturday, August 17, 2013

Sewing Room Link Up

 
I'm linking up today with several other sewists who are sharing their sewing/crafting/creating spaces with Jennifer of Ellison Lane.  Link up with Jennifer to see lots of great sewing areas.  It's so much fun to eavesdrop into the world of other crafty ladies.  If you link up and join us, you will be eligible to win some great gift certificates!
 
This is my sewing room..... it's all of 6' x 12'.  As you can see, I make use of every inch.  I'm not going to fill this post up with lots of words..... if you have any questions and want to know what something is, etc., just email me or make a comment.  The photos will enlarge if you click on them.  I took these photos this morning without any clean up or straightening..... what you see is my real world.


The bookshelf is covering up a window.  I live VERY close to my neighbors and this window is only 6' away from their widow.  By covering it up, I have complete privacy although I loose the natural light.  I can be a bit of a hermit and crave solitude and quiet.  I can get a taste of this in my cozy little sewing room.  The little mini wall hangings on the shelves ..... hung with Clover Wonder Clips...... cover up totes full of fabric and other goodies. 


This area is next to the shelving unit and holds my ironing station.  There is also a cutting mat under the ironing surface.  I have used bed risers to make this high enough to be easier on my back.  Of course, all floor space is utilized under the table for more totes of fabric.  (I have more fabric in another room and also out in my garage....... I've been sewing my whole life and quilting since the 60's, so I have LOTS of fabric!)


This is the other end of the room with more shelves.  Most of these books are quilting books with an assortment of craft books thrown in.  More totes on top of the shelves with..... yes, more fabric.


Full view of the sewing end of the room.  My sewing machine is on the left and there is another cutting mat right next to the machine.  I can sew and trim without leaving my chair.  I also have a folding TV  tray that I use for ironing if I don't want to get up and go to the other ironing surface.  Sounds lazy, but if you are sewing tons of little seams, it sure cuts down on the time if you can sew and quickly rotate to trim and iron. 


And here's a full view of the other end.  Kind of gives you a perspective of my little space.  It may be small, but it's very functional and efficient for my needs.

Hope you'll visit the other blogs to see more sewing rooms.... I love snooping.... don't you?!

Sunday, August 11, 2013

 
I finally finished my donation for the 2013 Mennonite Hunger Relief Auction.  The finished size is 16" x 16" and there are 200 pieces in the top.  I've called it "200 Pieces."  Pretty creative title....huh?  This is the auction that only allows hand quilting, thus, the quilting is sparse.  :)  There is no way that I could have done any quilting in the tiny blocks themselves.  I planned to bind the hanging with the turquoise fabric, but didn't have enough.  I ended up using a gray fabric from my stash.


Here's a close up of my clumsy quilting.  It came out OK, but if my hands didn't hurt so much, I could make smaller stitches.  This may be my last donation for this auction because of the hand quilting requirement.  I'll just have to see what my thoughts are after the first of the year when it's time to start planning the next quilt.


The auction isn't held until the latter part of September.  I usually attend and will let you know if my little hanging sells.  It's for a great cause, so I hope someone likes it!

Friday, August 9, 2013

Week two of the Sew Lux Quilt Along.  This week, I've added my sashing and my borders to the charm square sections.  Sorry about these pictures.  This quilt is only 53" x 60" but I don't have a large enough spot of floor space to lay it down for shots.  I had to put it on top of my bed for the pictures which leaves them distorted and not rectangular.  You get the idea, though.....


This is a nice pattern and a great use for charm packs.  Again.... go to the Sew Lux link above to get the free pattern and instructions.  I spent one afternoon sewing the charms together and another afternoon cutting and sewing the sashing.  Pretty fast for a nice sized lap throw.


Next week is the quilting and binding.  I struggle with the quilting part and will wait to see if they have some good tips for machine quilting instead of just jumping in and finishing my quilt right now. 

Saturday, August 3, 2013

 
I saw this "simple" child's craft on Pinterest and thought it was kind of cute.  I picked up a few supplies.... cheap melting beads and a special surface to align the beads.... and set forth.  Placing the beads was quite easy, although tedious.  (They had a tendency to roll away or stick to my fingers.)  The sewing machine on Pinterest didn't have a base but I wanted my machine to stand on its own.  Once you arrange your beads, you iron the beads to melt them.... first one side.....cool.... turn it over and iron the other side.  The bottom of my iron must not be flat or heats unevenly, as I had a terrible time getting a consistent melt.  You can see that I really did a melt job on the right side.


I'll give it another try some other day with another iron.  It was fun to make and would make a cute ornament or gift tag if you left the stand off.  Consider the possibilities.... :)

Friday, August 2, 2013

 
 All of the "Christmas in July" and "Christmas in August" blog hops have inspired me to join a Christmas quilt along.  Sew Lux Fabrics has a quick, simple one that just started, so you have plenty of time to join in.  It starts with a basic charm pack and could be made with any charm pack and any theme, not just Christmas.  All the details can be found through the link above.


This is the fabric that I'm using.  I got the charms all sewn today and next week we will get instructions on the sashing and borders.  Oh... it's free, of course, and is a great pattern for a cozy lap throw.  Hope you'll join me!

Sunday, July 14, 2013

 
Before.....


After.....


Here's the second block in the Fat Quarter Shop Designer Mystery BOM.  Since this is also the second basket block, two for two, I'm seeing a potential pattern.  It might be too soon to call, but I'd be really happy with a basket quilt made out of these great fabrics.  We'll see what next month brings!

Wednesday, July 10, 2013

I finished this month's Sew Lux BOM.  (Yeah... I'm on schedule....two months in a row!)  Again, I'm doing this BOM series with two fabric lines.... same pattern..... different fabrics. 
 
The first block is done with the original fabrics, the fabrics that are shown in the directions.  It came out pretty well without too much trouble.  I like the way the directional middle fabric gives kind of a spinning effect. 


The second block didn't go as smoothly.  I'm not even sure if I have the fabrics in the right places even though they tell you which fabrics are A, B, and C.  I do wish they would enclose a photo of the finished block using the alternate fabrics.  I'm a visual kind of person and I'm not sure if I've put this together correctly or not.  It really doesn't matter, but I do think I'd like the navy on the outside, similar to the first block. 


I will probably get my Fat Quarter Shop BOM in the mail tomorrow or the next day and I'm actually ready to work on it.  Bring it on!

Monday, July 8, 2013

 
I went ahead and put the borders on last night, going with a 3" border.  I can always make it narrower.  It's now 16" square. I'm going to bind it with the turquoise fabric if I have enough left over.  I may even pipe the edge instead of regular binding.  I had planned on adding a tatted trim around the blocks, but when I laid it on top of the blocks, it just took your eye away from the quilt and made it too complicated..... didn't add anything to it. 


Now I have to hand quilt it.  Yuck...... I don't enjoy hand quilting at all anymore.  Too painful for my hands.  This auction will only allow hand quilted quilts.  You can machine piece...thankfully.... but cannot machine quilt your donation.  This little quilt is just screaming for precision, machine quilting in some sort of straight line or geometric pattern.  My hand quilting will not do this justice and will actually make it less appealing.  When you are auctioning off quilts for hunger relief, you would think they would allow machine quilting which would probably double their quilt donations and thus make tons more money.  But, alas, rules are rules ..... traditions must stand .... and hand quilt, I must.

Sunday, July 7, 2013

Auction Quilt

 
I had a chance to continue with my auction quilt this week end and have finished the tedious blocks.  This LITTLE quilt is only 10" square finished and has 200 pieces in it!  I'm pleased with my design and the overall look and I'm now ready to add borders, which I think will be 2" or 3".


Here's the backside where you can see all of the pieces.  I used a soluble foundation paper, so I'll be able to soak the papers off and iron it dry, trying to keep things from distorting.  I'll add the borders before I remove the papers, which will also help it to keep a nice square shape.


The problem with this being so small (I'm thinking it will be only 14" to 16" square with its' borders added) is that it won't be very visible when it's actually on the auction block.  If I get it to the organizers in a timely fashion, it will be listed in the auction book, where I'll be able to add a little description about it.  I'll be sure that I make that happen so that it doesn't get overlooked with all of the big boy quilts.  :)

Thursday, July 4, 2013

4th of July


Happy 4th of July!
 
I'm very grateful to live in the United States where I'm blessed with many freedoms and privileges.  Many thanks to all who have made this possible.  God Bless the USA!